How to test a used vacuum cleaner beyond its suction claim
Quick answer
Run the vacuum with its normal floorhead on a suitable floor, then check the hose, seals, brush roll and every included powered tool. For cordless models, start charged and observe real use rather than a few seconds with no attachment. Inspect filters and odour, and price the exact battery, charger and replacement parts before deciding the used price is a saving.
Match the vacuum to your floor and replacement parts
Write down the floor surfaces, stairs and upholstery you need to clean. A hard-floor head may differ from a powered carpet head, and the accessory names in a listing may be vague. Ask for the exact machine model, battery type where fitted and photographs of each tool’s connection.
Check the manufacturer’s current parts listing for the correct filter, bags, brush roll, battery and charger. A similarly named vacuum may use a different attachment system or battery revision. If a key part is unavailable, a low asking price does not make the machine easier to maintain.
Ask what it was used to collect, whether it has had liquid exposure and why it is being sold. Household dry vacuums, wet-and-dry machines and workshop extractors serve different purposes. Do not assume a household unit is suitable for building dust or hazardous material because its hose looks powerful.
Make a room-by-room tool list: suitable head for each floor, narrow tool for edges, a manageable stair arrangement and upholstery tool if needed. Check the assembled weight and reach in the configuration you will actually carry. A stick vacuum comfortable as a handheld can feel different with its floorhead and wand; a canister’s long hose can be useful only if its joints and controls work.
For example, a bundle with three small brushes but no working powered carpet head may be incomplete for a mostly carpeted home. The same omission may matter less for a buyer with suitable hard floors and an appropriate included head. Match tools to the job before giving every accessory a share of the bundle’s value.
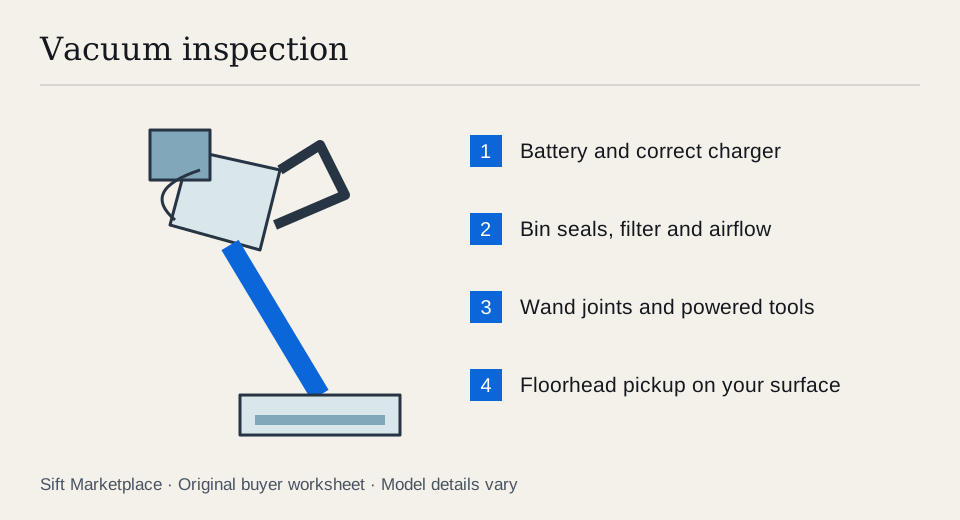 Enlarge diagram
Inspect it before you switch it on
Ask the seller to empty the bin or show the bag compartment without releasing dust into the room. Look for damaged seals, cracked catches, corrosion and odour that remains after ordinary emptying. Inspect the hose and wand for splits or repaired sections.
With power disconnected, or the battery removed where the manual permits, inspect the brush roll for tangled material, damaged bristles and worn end bearings. Do not put fingers near a powered brush. Check clips and joints by connecting the parts normally; tape holding a latch together is a repair to price, not an accessory.
Look at the filter and its seating. Dyson’s care guidance says washed filters must be completely dry before refitting and gives a minimum drying period for its products. Follow the matching instructions for the actual machine. A wet filter at pickup prevents a sensible normal-running test, and a filter that looks clean does not prove its full service history.
Test pickup rather than a hand over the nozzle
Arrange a small ordinary cleaning area with the seller’s permission. Use only dry material and surfaces the manual allows. Do not invent a dust challenge with fine powders, sharp debris or anything hazardous.
- Start in a normal mode. Listen for abnormal grinding, a harsh rattle or pulsing that persists with the correct parts fitted.
- Clean with the intended floorhead. Confirm the brush turns where appropriate and that the head moves normally on the surface.
- Check the full path. Try the wand, hose and direct handheld arrangement if the model supports them. A tool working on the body but failing through the wand points to a different problem than a weak motor.
- Try each powered accessory. A motorised upholstery tool can fail independently of the main floorhead.
- Change the available modes. Verify controls respond and the vacuum remains stable. Do not run the machine with blocked airflow as a stress test.
- Recheck the bin and joints. Look for leaks, latches opening or debris escaping into places it should not reach.
- Inspect normal shutdown and charging. Check the charger fits properly and the machine recognises charging without needing the connector held at an angle.
For a corded model, inspect the full accessible cord and test the reel if fitted. Do not continue if insulation is damaged or the plug shows signs of overheating. For a cordless model, inspect the battery casing and avoid charging a swollen or damaged pack.
If pickup is poor, test the normal supported arrangements one at a time. A powered head that runs directly on the body but fails through the wand raises a connection-path question. A vacuum that pulses in every normal configuration needs a broader check. Let the seller address a visible ordinary blockage using the manual, then repeat the same small cleaning area. Do not run it with filters removed to create an impressive airflow demonstration.
Ask for a charged, dry, assembled demonstration in advance. A freshly washed filter still drying or a missing charger can prevent the very test that would justify travelling. If a head stops on your ordinary permitted floor after setup is corrected, treat that as an unresolved result. A known replacement seal or consumable with a real part number is negotiable; an unknown motor, head-drive or battery fault should not be assigned an invented cheap fix.
Keep battery claims in context
Ask the seller to start with a charged battery and demonstrate the powered head on the mode you will normally use. Record how long you observed it and what the charge indication did. A few seconds in an unloaded low-power mode does not establish useful cleaning runtime.
Do not compare an observed high-power run directly with an advertised maximum that may describe a different mode and attachment. Check the manufacturer’s conditions for the exact model. If a full relevant runtime test is unavailable, leave capacity as uncertain and include the cost of a verified replacement battery in your decision.
| Observation | What to establish |
|---|---|
| Pulsing or repeated cutout | Blockage, filter, battery or another unresolved fault |
| Brush stops under ordinary use | Head condition, drive and compatibility |
| Strong odour | Whether cleaning or replacement can realistically address it |
| Loose bin or cracked seals | Exact replacement availability |
| Rapid cordless shutdown | Demonstrated behaviour and battery replacement cost |
| Missing charger | Correct part specification before buying |
Add the immediate maintenance bill
Include filters or bags you will replace, any missing floorhead, a correct charger and transport. Do not credit a box of incompatible accessories at its advertised retail value.
An illustrative $75 vacuum needing a $60 battery, $25 filter and $20 charger totals $180. A $150 complete machine with better demonstrated condition may be the better purchase. The numbers are examples, not typical part prices; use actual compatible quotes in the cost calculator.
If the machine connects to an app, have the seller remove their account association through the maker’s process and verify setup where needed. Robot vacuums add navigation, docking and map-reset checks beyond a basic stick or canister test; do not assume a brief manual run proves automatic cleaning.
Sift, a free Facebook Marketplace filter and scam checker that also works on Kijiji, helps focus local model searches on Chrome on a computer. Use listing filters and recorded prices, then choose the machine that works as a complete cleaning system.
Questions people ask
Does strong suction at the open hose prove a vacuum works well?
No. It does not test the floorhead, brush drive, seals or pickup on your floor type. Use the complete normal cleaning setup and inspect where airflow or brush operation may be lost.
Can I confirm cordless battery life in a short pickup test?
A short test can expose sudden shutdown or very rapid depletion, but it does not establish full runtime. Ask for a charged demonstration with the powered head and mode you will use, and keep untested capacity uncertain.
Can a freshly washed filter go straight back into a vacuum?
Follow the exact model’s instructions and let washable filters dry fully. Dyson’s filter-care guidance says its washed filters need at least 24 hours and must be completely dry before refitting. Not every filter is washable.
Sources
- 01Dyson Cordless vacuum filter care