Can a used kitchen cabinet set make a workable kitchen?
Quick answer
Measure and inventory every reusable cabinet, then build a layout around your actual room, appliances and services. Separate unaltered usable units from cut or damaged pieces. Confirm matched fronts, hardware and supported installation before pricing removal and transport. A full kitchen in the seller’s photograph may not make a complete kitchen in yours.
Start with a room plan and fixed constraints
Draw each wall and mark doors, windows, corners, ceiling changes and the locations of existing services. Record appliance models and the installation clearances from their manuals. Include door and drawer movement, not just the line of cabinet boxes. Get qualified design or installation help where the layout or building conditions require it.
IKEA’s kitchen planning steps and SEKTION installation guide put measurement and installation planning ahead of assembly. Use the correct guidance for the system you are buying. A reclaimed set may contain older generations, custom alterations or parts that do not match current stock.
Do not move plumbing, gas or electrical services on paper merely to make a cheap cabinet set fit. Get the relevant professional feasibility and cost first. The cabinet price is only one part of that decision.
Number the cabinets while they are still installed
Ask for a front photograph of the full kitchen, then a numbered list with actual width, height and depth for each unit. Photograph the inside, underside, back where accessible, hinges, runners and any labels. Include separate counts for doors and drawer fronts, since a reusable box and a matching front are different assets.
 Enlarge diagram
| Field | Record |
|---|---|
| Unit number and type | Base, wall, tall, corner or specialty cabinet |
| Actual size | Width × height × depth; note trimmed sides or backs |
| Structure | Bottom, back, joints, mounting points and moisture damage |
| Fronts | Door/drawer identity, dimensions, hinge drilling and finish |
| Hardware | Hinges, runners, shelves, legs, rails and required mounting pieces |
| Alterations | Sink or pipe cuts, appliance cutouts, drilled holes and repairs |
| Disposition | Use in plan, obtain assessment, surplus or reject |
A current SEKTION frame listing is an example of identifying a box by exact article and dimensions. It does not imply that all older IKEA fronts or runners are compatible. Check system generation and part identifiers before counting a missing piece as easily replaceable.
Inspect the parts that removal may conceal
Pay particular attention to sink bases, dishwasher-adjacent panels, plinth areas and units near steam or heat. Note swollen edges, soft material, peeling surfaces, staining and persistent odour. A freshly painted front does not reveal the condition of the box behind it.
Operate every drawer and door while the installation is still stable. Inspect hinge attachments, runner fasteners and shelf supports. Ask which issues are adjustments and which are damaged material; do not accept a claimed easy adjustment without confirming the underlying fixing is sound.
Ask about adhesive, custom fillers, joined countertops and hidden fastenings. Some elements may not survive removal intact. Do not value a countertop as reusable until a competent installer confirms its dimensions, cutouts, removal and support requirements. A fragile slab is a separate professional moving problem.
Build the layout using only confirmed usable units
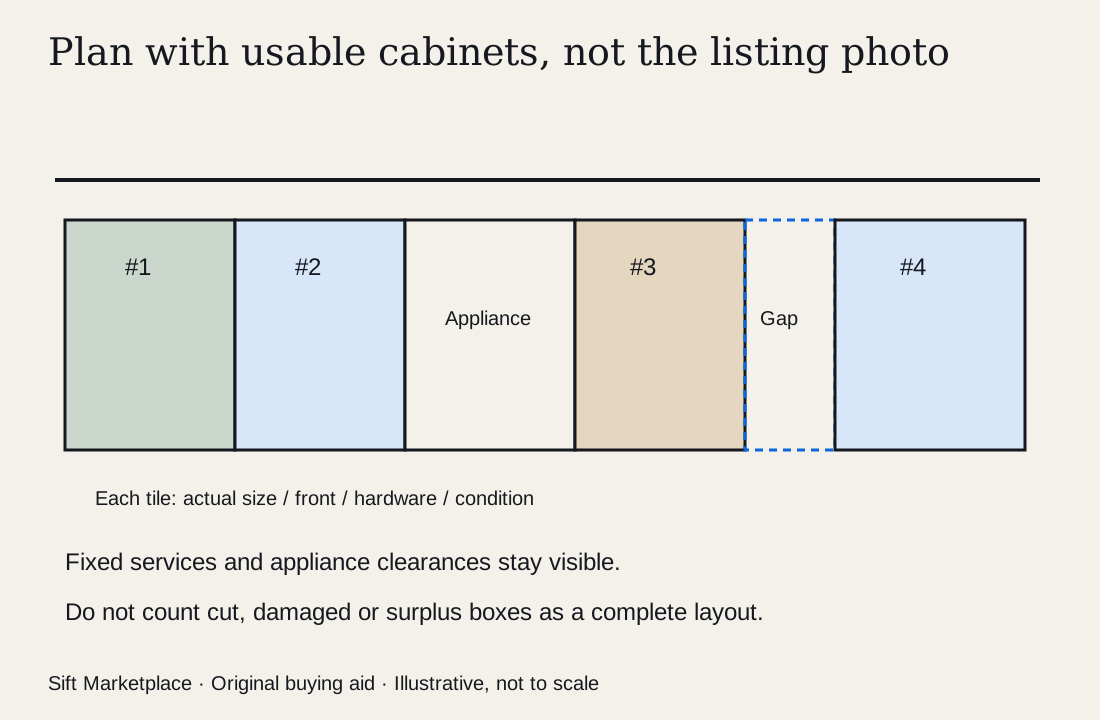
Create paper or digital tiles at a consistent scale. Place fixed appliance/service areas first, then the usable cabinets. Leave every gap visible. Do not silently stretch a 30-inch unit to fill a 32-inch opening or count a damaged sink base as a normal storage cabinet.
Check corner access, door interference, end panels and filler needs. A nominal row length can fit while a handle hits a wall or a drawer cannot open beside an appliance. Ask the system maker or installer about the correct parts and clearances.
A hypothetical 120-inch wall might need a 24-inch appliance space, a 24-inch sink unit, two 24-inch storage units and 24 inches of other required elements or gaps. If the donated set supplies a 36-inch sink unit instead, the layout has changed; the “same number of cabinets” is irrelevant. These illustrative dimensions are not a recommended kitchen design.
Agree on removal before paying
Confirm who disconnects services, removes cabinets, protects the property, handles waste and bears the cost if a piece breaks. Use qualified trades for regulated work. Inspect the reusable pieces after removal where practical; an installed-only agreement should explicitly account for the uncertainty of hidden damage and removal.
Label fronts, boxes and hardware by unit number. Keep matched runners and hinges together. Arrange a dry storage space if installation is later. Repeatedly moving unprotected panels can create damage that was absent when you first inspected them.
Compare the finished project cost
In a hypothetical example, a cabinet set is $500. Removal costs $300, transport $180, confirmed missing fronts/hardware $220 and installation assistance $800: $2,000 before any separately needed countertop or service work. These invented figures show why the listing price is not a kitchen budget.
Compare that usable layout with another used set or a new system at the same scope. Do not offset the cost with assumed resale proceeds for surplus pieces. Use the cost calculator for confirmed purchase costs, and keep unresolved removal damage or service changes visible until quoted.
A useful message asks for the numbered dimensions, system labels, close-ups of moisture-prone areas, included hardware and exact removal arrangements. Buy only after the layout and installation plan work. Negotiate specific obtainable parts; pass when the saving depends on unsupported structural repairs, unavailable matching components or service changes you cannot justify.
Sources
- 01IKEA Canada SEKTION kitchen installation guide FY25
- 02IKEA Canada SEKTION 30-inch base cabinet frame
- 03IKEA Canada Kitchen planning and purchase steps