How to buy a used telescope you will actually use
Quick answer
Identify the optical tube and mount separately, check the complete kit and choose a size you can carry and store. Inspect optics without touching them, test the focuser and mount, and view a safe distant target or the night sky. Ignore huge magnification claims. Never point a telescope or finder at the sun during a buying inspection.
Choose the observing job before the telescope
Decide whether you want casual views of the Moon and planets, wider star fields or a system for photography. Also decide where you will store it and how far you must carry it. A large telescope that needs several awkward trips from the flat to the car may be a worse purchase for you than a smaller one you can set up comfortably.
Celestron’s buying guidance explains the role of aperture and the tradeoff between larger optics and weight. Use the actual aperture and optical design in the listing, rather than a headline promising hundreds of times magnification. Its eyepiece guidance notes that magnification beyond the useful range does not add detail.
Ask for the optical-tube model, mount model and all included accessories. A tube on an undersized mount is not a balanced system. For imaging, investigate the particular mount, camera attachment, tracking and payload requirements before assuming any motorised telescope is suitable.
Try the practical route as well as the eyepiece. Measure the storage opening, longest packed component and space in your vehicle. Ask how many separate pieces must be carried and which tools assembly needs. A tabletop design also needs an appropriate stable support at the observing site; a table in a listing photo may not be part of the sale.
A useful acceptance plan might read: “Carry in two manageable trips, assemble without missing hardware, reach focus with the supplied low-power eyepiece, and track the Moon using controls I can reach.” An imaging plan would add camera fit, balance, power and the particular tracking performance needed. Do not pay for the imaging promise on the evidence of that visual-observing test alone.
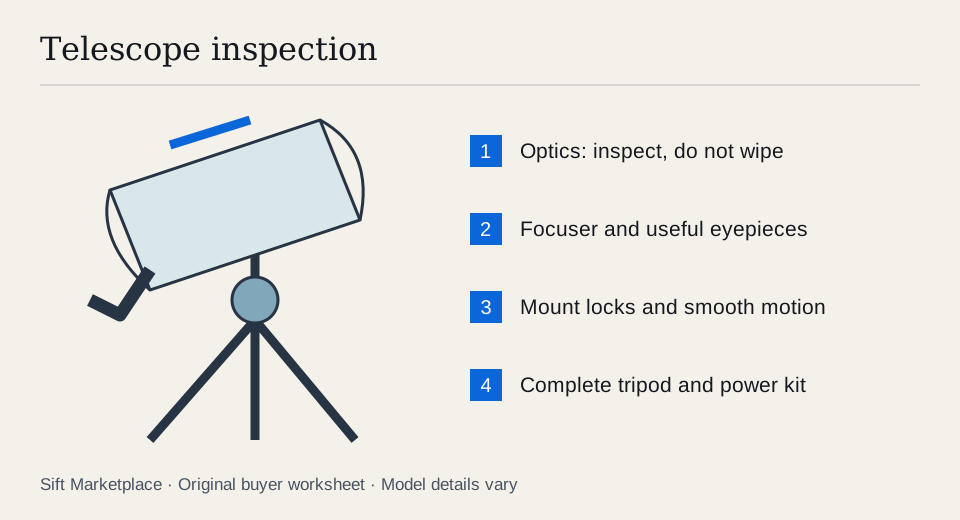 Enlarge diagram
Ask the seller to assemble the complete kit
Seeing the telescope fully assembled reveals missing mounting hardware and gives you a realistic sense of its size. Check that the dovetail or other attachment is appropriate and secure. Inspect tripod clamps, spreader, feet and mount locks for cracks, stripped threads and improvised repairs.
Count the items needed for the model: eyepiece, diagonal where applicable, finder, power supply, counterweights, hand controller and any model-specific adapters. A missing dust cap is inconvenient; a missing proprietary controller can make the proposed demonstration impossible. Price replacements before considering the bundle complete.
For a computerised mount, verify that its controller starts, keys work and the motors move normally using the proper power supply. Do not let a rapid motor demonstration substitute for a successful alignment and tracking test if those functions are central to your purchase.
Inspect optics with restraint
Use ordinary indirect light and ask the seller to remove the appropriate caps. Look for cracks, obvious coating damage, extensive haze and unusual branching contamination. A bright torch can make minor dust look dramatic; it does not automatically tell you how the telescope performs.
Never wipe a mirror or dismantle an optical assembly at pickup. Reflector alignment, often called collimation, is different from cleaning. Celestron notes that reflectors may need occasional alignment; an out-of-focus view is not by itself proof of ruined optics. It still needs to be resolved well enough to judge the telescope you are buying.
Make a simple viewing test useful
- Begin at low power. Use a suitable low-magnification eyepiece on a safe distant target well away from the sun, or a clear night-sky target.
- Move the focuser through normal travel. It should move smoothly and hold the eyepiece without slipping. Do not force the end stops.
- Track manually. Follow the target using each mount axis or slow-motion control. Look for sticking, sudden jumps or locks that fail to hold.
- Check settling after a gentle touch. Focus normally and observe whether vibration makes the view frustrating. Judge it at the tripod height you will use.
- Try the supplied eyepieces. Check that each fits correctly and reaches focus in the intended arrangement. Look through the finder as well as the main tube.
- Demonstrate the motors if fitted. Test both axes, normal controls and power connections. For a night test, ask the seller to show the advertised alignment and tracking functions.
- Note what remains untested. A daytime view cannot establish all night-sky optical performance, tracking precision or long-exposure capability.
For an illustrative magnification calculation, a 1,000 mm focal-length telescope with a 25 mm eyepiece gives 40×. A 10 mm eyepiece gives 100×. Those are arithmetic examples, not recommendations for every optical system or viewing condition. The included accessories should be useful for that telescope, rather than merely numerous.
Separate three observations in your notes: mechanical operation, daytime image and night-sky result. A smooth focuser on a distant daytime target clears a different question from a successful alignment and tracking session. If you cannot arrange the night test, state that limit when comparing candidates rather than silently treating it as passed.
For example, two similar optical tubes may both focus sharply, while one mount slips when locked and the other’s controller cannot start. Neither is equivalent to a complete working system simply because the optics look clean. A missing ordinary eyepiece can be a confirmed accessory cost. A mount that will not hold or a motor system that cannot demonstrate its required function needs an assessed remedy before you price it as usable.
Price the kit you can use tonight
| Missing item | Why a substitute may not be simple |
|---|---|
| Eyepiece or diagonal | Barrel size and optical arrangement must match |
| Counterweight | Shaft fit and required balance matter |
| Controller | Mount generation and connections may differ |
| Power supply | Correct voltage, polarity and current are essential |
| Tripod spreader or bolts | Structural support and attachment are model-specific |
| Finder bracket | A finder without the matching shoe may not mount |
An illustrative $200 telescope needing a $70 controller and $40 power supply reaches $310 before any eyepiece or repair. Compare that with a complete demonstrated setup using the cost calculator. Confirm actual replacement availability; a guessed price for an unobtainable part is not a budget.
Protect optics during transport and follow the manual’s packing guidance. Secure counterweights and heavy components separately where instructed. Take an inventory before loading so the small adapter that makes the kit usable stays with the telescope.
Sift, a free Facebook Marketplace filter and scam checker that also works on Kijiji, helps focus model searches on Chrome on a computer. Use listing-word filters to shorten the shortlist, then recorded prices to compare complete systems while arranging the viewing test.
Questions people ask
Is high magnification the best way to compare used telescopes?
No. Aperture, optical quality, mounting stability, eyepieces and conditions matter. Celestron explains that exceeding useful magnification enlarges the view without adding detail. Compare the complete system and what you want to observe.
Is dust on a used telescope mirror a reason to reject it?
A little visible dust is different from damaged coating, fungus-like growth or a cracked optical surface. Do not wipe a mirror during pickup. If you cannot distinguish contamination from damage, seek an experienced assessment before pricing a repair.
Can I test a telescope during the day?
A distant target well away from the sun can show focusing and mount operation, but it does not replace a night-sky optical test. Never aim the telescope or finder toward the sun, and do not use an unknown second-hand solar filter as part of the demonstration.
Sources
- 01Celestron How to buy your first telescope
- 02Celestron Choosing telescope eyepieces