How to inspect a used drum kit, acoustic or electronic
Quick answer
Inventory the actual kit before comparing prices. For acoustic drums, inspect shells, bearing edges where accessible, cymbals and stands, then play each drum. For electronic kits, test every pad zone, pedal and output with the included module. Check compatibility and missing hardware. A shell pack or pad bundle is not necessarily a complete kit you can sit down and play.
Ask for a complete inventory before making the trip
List every drum or pad, each cymbal, the snare stand, hi-hat hardware, bass pedal, throne, mounts and cables. Photograph the seller’s assembled kit with permission so small clamps and adapters are not forgotten during collection. Keep people and unrelated personal items out of the photograph.
A shell pack may contain only the drums. An electronic package may require separate hardware, too: Roland’s VAD103 specification identifies a kick pedal, snare stand, hi-hat stand and throne as absent from that retail package. Inventory the used bundle itself rather than assuming a stock photograph establishes its contents.
Measure the space available at home and the route for transport. For an electronic kit, also consider noise from sticks and pedals transmitted through the floor. Headphones change amplified sound; they do not make the physical playing silent.
 Enlarge diagram
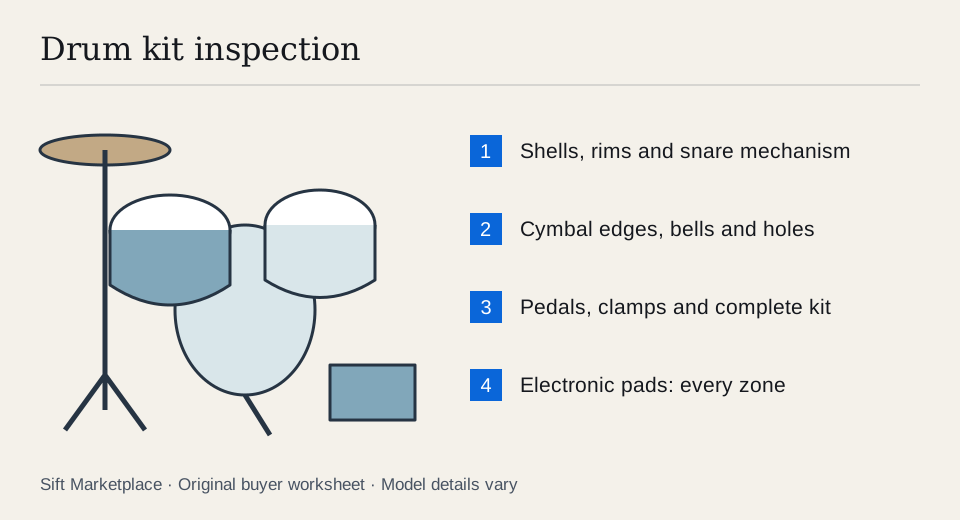
Write the inventory as a playable arrangement. An acoustic five-drum shell pack still needs suitable cymbals, cymbal supports, snare support, hi-hat hardware and a kick pedal. For an electronic kit, add each cable, clamp, controller and the correct module supply. Group small mounting parts with the component they support so a bag of unidentified clamps is not counted twice.
Sit at the assembled kit before packing it. Put the snare, pedals and cymbals where you can reach them and confirm the stands hold there. A compact listing photograph can omit the space occupied by the throne, player’s legs and pedal travel. Compare that actual footprint with your room and access route.
Inspect an acoustic kit from the shell outward
Check shells for cracks, separating layers, distortion and swelling. Look around mounts and lugs for damage or repairs. Inspect hoops, tension rods and floor-tom legs, noting missing or badly corroded parts. A wrap lifting at its seam is a different issue from a shell separating beneath it.
Bearing edges, where the drumhead meets the shell, affect how the head seats. If the seller is comfortable removing a head, inspect the exposed edge for chips and damage without scraping or sanding it. Do not dismantle a kit casually when the seller has not agreed, and do not claim an uninspected edge is sound.
Play each drum at ordinary volume with permission. Check that tension rods turn normally and the drum can reach a usable tuning, without asking the seller to overtighten it. Worn heads are replaceable consumables; cracked shells or damaged mounting points deserve separate repair assessment.
Inspect the snare mechanism. Engage and release the wires, check the adjustment and listen for a strainer that slips. Ask which rattles remain when adjacent drums and stands are lightly isolated. A room full of resonant hardware can make a noise hard to locate, so work one component at a time.
Give cymbals and stands their own inspection
Hold cymbals by the edge carefully and inspect the entire circumference, bell and centre hole under good light. Look for cracks, enlarged or distorted mounting holes and previous cut-down repairs. Do not flex a cymbal aggressively to expose damage.
Listen to each cymbal on a properly protected stand, beginning with gentle playing. A crack may be visible without producing an obvious buzz in a brief test. A repaired cymbal should be priced and described as repaired, even if you like its sound.
Set every stand to a useful playing position. Check clamps hold, telescoping tubes do not slip and feet sit securely. Test the bass pedal linkage, return spring, beater attachment and hoop clamp. Work the hi-hat pedal and clutch through normal travel. Small missing felts or sleeves are easy to price; a stand that cannot lock needs more attention.
For an electronic kit, test every zone and controller
Bring comfortable headphones and your normal sticks. Ask the seller to select a straightforward acoustic kit sound rather than a layered effect that hides missed triggers.
- Identify module and pad models. Record mixed or replacement components and compare them with the maker’s supported combinations.
- Play soft and firm hits. Test each pad across the surface, listening for missed hits or unexpectedly loud notes.
- Test head, rim, bow, bell and edge where supported. Do not credit a three-zone cymbal if the included module or wiring only demonstrates one zone.
- Check cymbal choke. Use the normal grip specified for the pad and verify the function where supported.
- Play the hi-hat through its range. Test closed, open and pedal actions. Check the actual controller, not only the cymbal pad.
- Try repeated kick hits and short patterns. Look for double-triggering, cutouts and rack movement during normal playing.
- Test headphones and required outputs. If USB or MIDI is part of your plan, connect it to your own supported device and confirm the intended function.
Roland’s model-specific compatibility page shows why pad names and module names both matter. Use the relevant table and trigger settings for the actual kit. A fault may be a setting, cable or pad, but the seller should resolve and demonstrate it before you value the component as working.
On an electronic kit, make a pad-to-module map: pad model → cable → input → configured pad type → demonstrated zones. For example, a ride cymbal may produce a bow sound but have its bell and edge untested. Do not value those extra zones until the documented combination and wiring demonstrate them. A correct trigger setting may resolve a mismatch; an unexplained missed zone remains an open fault.
For acoustic kits, keep shells, heads, cymbals and hardware as separate condition rows. A worn head with a verified replacement differs from a cracked shell. A cymbal you enjoy despite disclosed damage is still a damaged component; avoid comparing the bundle with intact-cymbal examples. Buy the assembled kit you can use, negotiate known consumables, and obtain an assessment before assigning small repair allowances to structural or trigger faults.
Compare a complete playing kit
| Acoustic kit | Electronic kit |
|---|---|
| Heads and snare wires | Worn mesh heads and trigger components |
| Cymbals and protected stands | Compatible cymbal pads and cables |
| Bass pedal and hi-hat stand | Kick pedal and hi-hat controller |
| Throne and drum key | Throne, module mount and power supply |
| Cases and transport | Rack clamps and transport protection |
An illustrative $300 kit needing $100 of cymbal hardware and $80 of heads totals $480 before collection. A $450 complete kit might be the better value if it meets the same needs. Those are example inputs, not typical kit prices. Use the cost calculator with actual compatible replacements.
Sift, a free Facebook Marketplace filter and scam checker that also works on Kijiji, helps narrow model and module searches on Chrome on a computer. Use listing-word filters and recorded prices, then base the offer on the kit you played and the parts you counted.
Questions people ask
Does a drum shell pack include cymbals and stands?
Do not assume so. Ask for an itemised list of drums, cymbals, pedals, stands, mounts and throne. Even complete retail electronic kits can omit some pedals or stands, so inspect the actual bundle.
Can I mix electronic drum pads and modules?
Only after checking the exact combination. Trigger zones, connections and controller behaviour vary. Roland publishes model-specific compatibility lists; a connector fitting does not prove every function will work.
Is a cracked cymbal a cheap fix?
Treat it as a damaged cymbal with uncertain useful life and sound, not a normal cymbal minus a small repair allowance. Inspect the edge, bell and mounting hole and listen to it. For a first kit, an intact suitable cymbal is easier to assess.
Sources
- 01Roland VAD103 pad compatibility
- 02Roland VAD103 package contents