How do you check whether a used roof cargo box fits?
Quick answer
Identify the box and mounting system, then check your crossbar spacing, bar shape, roof-load limits and hatch clearance against the manufacturer’s instructions. Inspect every clamp, hinge and locking point. A box that sits on the bars is not necessarily a compatible installation, and its advertised cargo capacity does not override the vehicle or rack limits.
Start with your existing roof system
Record vehicle year, make, model and roof type, then identify the crossbars and mounting feet. A box needs an approved roof-rack arrangement; bare roof rails do not automatically provide a place to clamp it.
Ask for the box model, generation, dimensions and photographs of the underside mounts. Different generations can use different clamps even when the product name is similar. Check the manufacturer’s manual for crossbar shape, dimensions, spacing and placement.
Confirm the capacity of the complete vehicle-and-rack combination. Thule’s capacity guidance directs buyers to vehicle-specific information. The box’s advertised payload is only one limit.
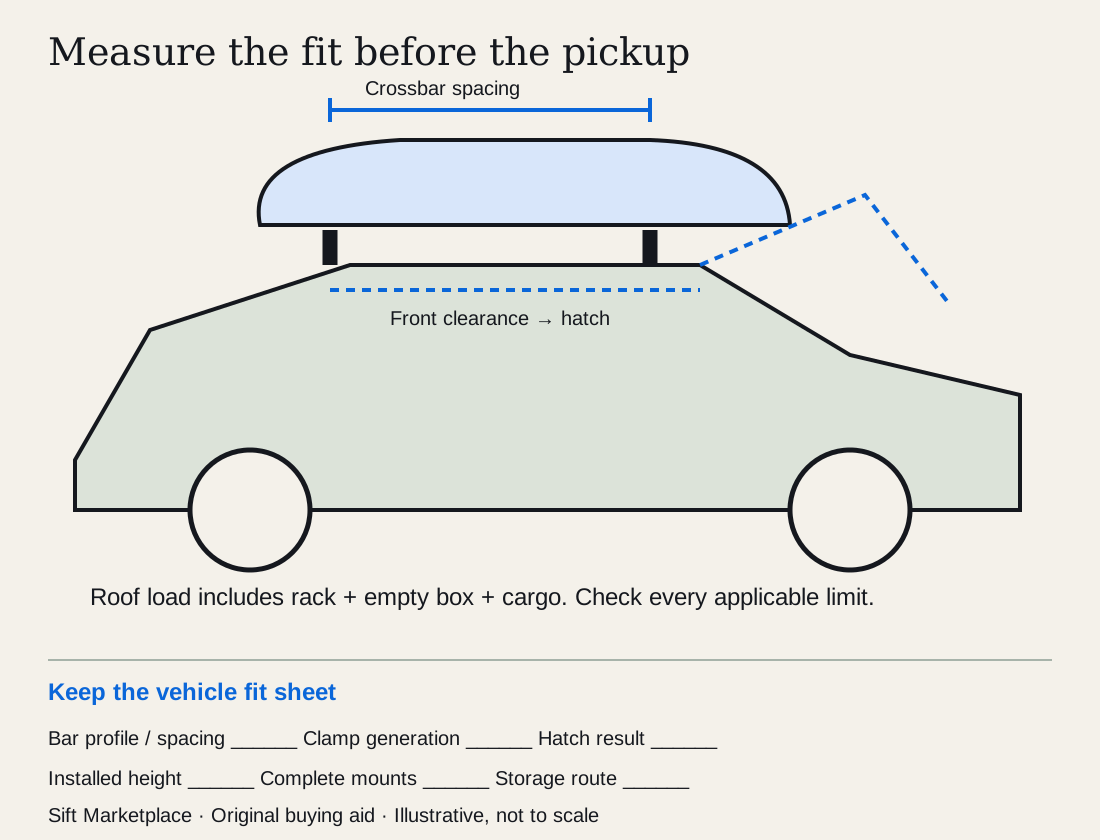 Enlarge diagram
Measure hatch clearance using the model’s method
A long box can interfere with a rear hatch even when its clamps fit. Thule’s clearance document uses a measurement from the front crossbar to where the roof meets the hatch, compared with a box-specific front-clearance figure.
Use the maker’s diagram and dimensions rather than guessing from overall box length. If your bars are adjustable, move them only within the vehicle and rack instructions. A position that gives hatch clearance but violates permitted bar placement is not a solution.
Also consider antenna, sunroof and garage clearance. Measure installed overall height once fitted and keep that measurement visible for travel. Do not assume a garage accepts the car merely because the empty vehicle fits.
Inspect every mounting and closing point
- Read the label. Confirm that the model matches the manual and that the mounting parts belong to it.
- Open the empty box. Look for cracks, distorted areas and repairs on both inside and outside surfaces.
- Inspect mounts. Check every clamp, plate, bolt and adjustment mechanism against the parts list. Do not accept improvised hardware as equivalent.
- Examine hinges and supports. Operate the lid normally and check for loose attachments or uneven movement.
- Check the lock and all latches. The seller should demonstrate correct closing and locking. A key turning is not proof every latch is engaged.
- Inspect seals and floor areas. Look for damage around mounting slots and places where cargo rests.
Surface scratches can be acceptable. Cracks around mounts, hinge anchors or locking points call for a manufacturer or service assessment before purchase. Do not conduct an improvised strength test by leaning on the lid.
| Finding | Required next step |
|---|---|
| Missing key, otherwise identifiable lock | Confirm the correct replacement process |
| Incomplete mounting kit | Price the approved complete kit |
| Crossbars outside the stated range | Choose a compatible box or approved rack arrangement |
| Hatch contacts the box | Resolve within permitted mounting positions |
| Crack near a mounting point | Seek assessment or pass |
| Scuffed lid with sound structure | Compare cosmetic condition |
Do the load arithmetic carefully
Your cargo must comply with the vehicle, rack and box instructions. Roof limits may account for the weight of the rack and empty box; read how each manufacturer defines its allowance.
An illustrative calculation: if an applicable total roof-load allowance is 75 kg, a rack weighs 5 kg and the empty box 20 kg, only 50 kg remains under that allowance. You must still check the box’s own cargo limit and all other restrictions. These are example numbers, not specifications for your car.
Keep heavy items positioned as the box manual directs and use its internal securing system. A lock keeps the lid closed; it does not secure loose cargo inside. Avoid treating empty volume in litres as permission to fill it with any weight.
Plan pickup and storage before paying
Keep a fit sheet with vehicle/roof system, bar model/profile, permitted spacing, box/clamp generation, hatch-clearance measurement and applicable load limits. Check each against its own instructions. If you still need the rack assembly itself, complete the crossbar fit check first; a roof box does not include an approved roof interface by default.
Consider a box whose clamps fit your bars but whose rear edge prevents the hatch opening. Moving bars outside their permitted positions is not a solution. Thule’s hatch-clearance guidance supplies a model-specific measurement method; use the correct current document for the exact box and record the result before arranging a drive. Also preserve the actual installed vehicle height for garage and route planning.
Inventory all clamps, internal retention parts, hinge/support components and keys. Obtain exact approved replacement-part prices. In a hypothetical comparison, a $160 box needs $95 compatible mounts, $25 lock parts and $30 collection: $310. A complete compatible box at $260 plus $30 collection totals $290. An unassessed crack near a mount leaves condition unresolved in either calculation.
Agree the transport method before paying. If taking it home on the roof, the correct rack and proper installation must already be available. Do not use partial clamps or loose straps as a temporary fitting. If transported in another vehicle, protect the shell and secure the empty box appropriately. Measure storage length, width and access to the location where it will live between trips.
Use the cost calculator for confirmed parts/collection and the listing comparison tool for fit evidence. Ask: “Could you send the exact model, underside mounts, all closing points and any repairs? I am checking clamp fit and hatch clearance against my rack.” Search complete models that fit the sheet; a price drop does not resolve an incompatible mounting system.
Questions people ask
Will any roof box fit any crossbars?
No. Clamp opening, bar profile, crossbar spacing and permitted mounting positions vary. Check the exact box and rack instructions. A seller’s statement that it fits most cars does not establish compatibility with your roof system.
How do I check rear-hatch clearance?
Use the box maker’s method for the specific model. Thule provides front-clearance measurements from the front crossbar to the roof/hatch meeting point. Compare your vehicle measurement with the box specification and do not reposition bars beyond their permitted range.
Can I use a box with a repaired crack?
Do not assume a patch restores structural strength or weather resistance. Ask the manufacturer or a qualified service provider about the specific damage and repair. Cracks near mounts, hinges or locking points deserve particular caution.
Sources
- 01Thule Roof box hatch-door clearance
- 02Thule Roof-rack weight capacity