How to test a used sewing machine on real fabric
Quick answer
Ask the seller to thread the machine correctly and sew on fabric similar to your projects. Test straight stitch, reverse, zigzag where fitted, feeding and pedal control, then inspect both sides of the sample. Check the bobbin, foot pedal and power lead match the model. A machine running without fabric does not prove it can form reliable stitches.
Choose the sewing job before the feature count
List the materials you expect to sew, the seams you need and the available workspace. Repairs to lightweight clothing, quilting and heavy bags place different demands on a machine. Hundreds of decorative stitches do not make up for poor feeding on the fabric you actually use.
Get the exact model number and download its manual. Establish whether the listing is a conventional sewing machine, overlocker, embroidery machine or a combined model. They are not interchangeable. If embroidery matters, check hoop availability, design transfer and supported software separately from ordinary stitching.
Ask when the machine was last serviced, what faults are known and which accessories are included. A dated service receipt is useful history, but still request a fresh sewing demonstration. A machine stored for years may require attention even when the case looks tidy.
 Enlarge diagram
Bring a small, sensible test kit
Take scraps similar to your normal projects, good thread and, if you already know the correct system, a suitable new needle. Avoid challenging the machine with an unsuitable stack of fabric as a strength test. Ask the seller to supply the correct bobbin and operate the machine initially.
Brother’s tension guidance says needle choice depends on fabric and thread, and recommends testing on the same kind of scrap as the project. That is more useful at pickup than a single stitch on whatever fabric happens to be nearby.
Set the machine on a stable table with good light. Inspect the cord, plug and pedal housing before power is connected. Keep fingers clear of the needle, turn the machine off before changing a needle or foot and follow its manual for threading and adjustments.
Sew a sample that covers the core functions
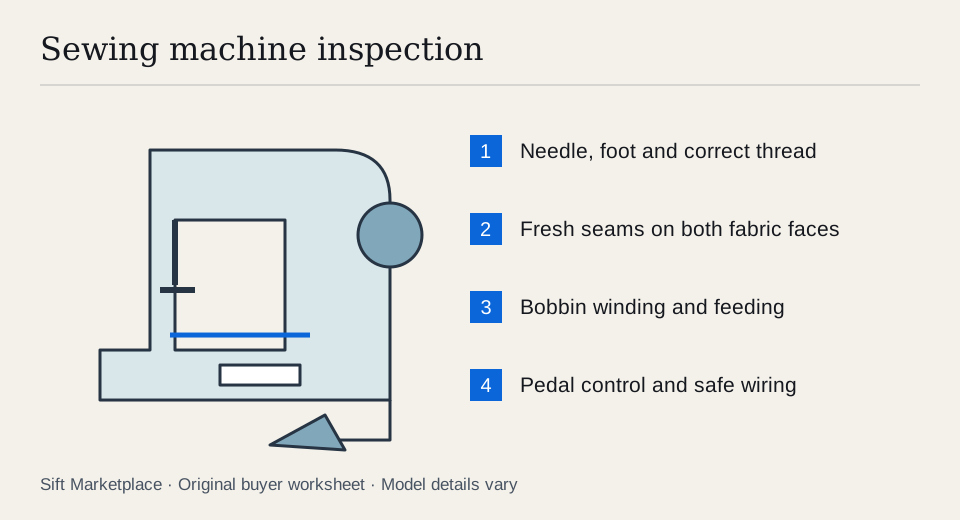
- Watch the threading. Have the seller thread the top and insert the correct bobbin according to the manual. Observe whether covers and guides are intact.
- Start slowly. Test whether the pedal allows a controlled start rather than jumping unpredictably to high speed. If the machine has a speed limiter, try it.
- Sew straight stitches at two useful lengths. Check the fabric feeds evenly and that the selected length makes a visible difference.
- Reverse and return forward. Verify the reverse control engages and releases. Inspect the join for repeated missed stitches or tangled thread.
- Try zigzag and another needed function. On a model that supports them, check width changes and a buttonhole or stretch stitch you plan to use.
- Inspect both fabric faces. Look for balanced formation, missed stitches, loops, puckering and damage. Pull the seam gently as you would in normal use, without trying to tear the sample apart.
- Wind a bobbin. Check the winder engages, winds evenly and returns the machine to normal sewing.
If stitches are poor, allow a proper threading or setup correction and repeat the same sample. Brother’s troubleshooting identifies threading, bobbin positioning and settings as possible causes of common problems. Those possibilities are reasons to diagnose, not a promise that every problem is minor.
Make the sample a small project card. On a suitable scrap, mark the selected stitch and length beside each row, then keep the underside visible. If your work includes a zip, knit seam or buttonhole, add that required task with the appropriate foot and material. A machine can form neat straight stitches while the buttonhole mechanism or stretch-stitch function you need remains untested.
For example, a garment buyer might test two layers of ordinary woven cloth, reverse at the seam ends and a buttonhole on a supported scrap with suitable stabilisation. A quilter might instead prioritise controlled slow feeding and the specified quilting arrangement. These are different acceptance samples, not a challenge to push every machine through the thickest stack available.
When loops appear, keep the first sample, correct threading and the documented setup, then sew a second labelled row. An improved second row is useful evidence. If missed stitches or poor feeding persist on suitable material, obtain a service assessment before deciding it is only tension. Avoid turning inaccessible bobbin-case screws during a hurried inspection as a substitute for diagnosis.
Look at the mechanical parts without taking it apart
With power disconnected, inspect the accessible needle plate, feed dogs and bobbin area. Look for heavy needle strikes, cracks, corrosion, missing screws and obvious broken parts. Turn the handwheel only in the direction specified in the manual and do not force a jam.
Check the presser-foot lift and any free-arm accessory box. Test the light, stitch selector and display where fitted. On a computerised machine, a damaged screen or unreliable control panel may be a more consequential repair than a worn ordinary presser foot.
Listen during sewing for severe knocking or intermittent grinding. Do not open the motor housing or apply oil indiscriminately to quiet it. Some locations and models have specific lubrication instructions; a seller’s improvised oiling should not replace a service assessment.
| Part | Check |
|---|---|
| Foot pedal and power lead | Correct model and safe condition |
| Bobbins | Correct type, not merely similar diameter |
| Standard presser foot | Secure fit and useful stitching test |
| Buttonhole foot | Correct accessory for the machine’s system |
| Needle plate and bobbin cover | Intact and properly seated |
| Embroidery hoop or unit | Exact compatibility and working demonstration |
| Manual | Accessible for the precise model |
Make an offer around a working sewing setup
A useful pre-visit message is: “Please leave it threaded with the correct bobbin and pedal. Can we sew forward, reverse and the function I need on these scraps, then wind a bobbin?” If the seller has packed away the pedal or cannot provide the required foot, decide in advance whether the trip can still answer the essential questions. A discount for a known spare foot differs from buying an untested control system.
Price missing parts through a source that identifies the exact model. A generic accessory bundle can include many feet you cannot attach. For a machine needing service, obtain a local assessment or quote before assuming a standard tune-up will fix it.
An illustrative $80 machine missing a $55 pedal and needing a $90 service allowance reaches $225. A $190 complete machine that sews your sample may be the better choice. These are example inputs, not current service rates. Use the cost calculator with actual quotes.
Keep the sample and notes on the settings used. Secure the machine upright for transport using its intended handle or carrying method, and pack loose feet and bobbins separately so they do not strike the machine. Do not lift a heavy machine by the spool pin or handwheel.
Sift, a free Facebook Marketplace filter and scam checker that also works on Kijiji, helps narrow the search on Chrome on a computer. Require the model terms you want and use exclusions carefully; “not working” and “working” can occur in very different descriptions. Follow recorded prices, then judge the deal by the sample the machine produces.
Questions people ask
Are loops under the fabric always a broken sewing machine?
No. Threading, tension, needle and bobbin problems can affect stitches. Have the seller follow the correct manual and repeat the test on suitable fabric. Buy on the successful result, not an unverified claim that threading is the only issue.
Can a domestic sewing machine sew thick leather?
Do not assume so from its weight or an all-metal description. Check the manufacturer’s intended materials, needle system and limits, then test a suitable sample. An industrial or specialist machine is a different purchase.
Does any replacement foot pedal fit?
No. Confirm the exact compatible pedal and electrical specification for the model. A similar plug is not enough, and a missing controller should be priced before buying.
Sources
- 01Brother Incorrect thread tension and test sewing
- 02Brother Common sewing machine problems